Tutorial
Yo Momma
For our sample application, we are going to make an SMS application that sends a random ‘yo momma’ joke to the person who sends the initial text, because there is no excuse to not have a ‘yo momma’ joke handy.
- The application parameters:
- Text ‘yo momma’ to some number
- Receive a ‘yo momma’ joke back
- No profanity validation required
- Inbound message must say ‘yo momma’ at some point
Installation
Firstly, let’s install pyrowire in a virtualenv.
$ cd ~/src
$ mkdir yo_mamma
$ *virtualenv* yo_mamma
$ cd yo_mamma && source bin/activate
$ *pip* install pyrowire
Generating Stub Files
Now that we have pyrowire installed, let’s create the stub files.
$ pyrowire --init
We now have our stub files all set in the root of our project folder. Let’s take a look at the raw sample app file:
import pyrowire
import settings

# configure the pyrowire application
pyrowire.configure(settings)

# all app.processor methods need to be annotated with the topic for which they process
# and take one kwarg, 'message_data'
@pyrowire.handler(topic='my_topic')
def my_processor(message_data):
    if not message_data:
        raise TypeError("message_data must not be None")
    # insert handler logic here
    return message_data

# all pyro.filter methods need to be annotated with the name of the filter
# and take one kwarg, 'message_data'
@pyrowire.validator(name='my_validator')
def my_filter(message_data):
    if not message_data:
        raise TypeError("message_data must not be None")
    # insert validation logic here
    # validators should try to prove that the message is invalid, i.e., return True
    return True

if __name__ == '__main__':
    pyrowire.run()
Defining the Handler
We want to zero in on the handler, since that is where we are going to get our joke to send back to the texter. Let’s look at how we could implement this:
@pyrowire.handler(topic='yo_momma')
def yo_momma_handler(message_data):
    if not message_data:
        raise TypeError("message_data must not be None")

    import urllib2
    import json

    resp = urllib2.urlopen('http://api.yomomma.info').read()
    content = resp.split('<body>')[1].split('</body>')[0].strip()

    message_data['reply'] = json.loads(content)['joke']
    pyrowire.sms(message_data=message_data)

    return message_data
And that’s it. The handler does a very simple thing; it fetches a response from api.yomomma.info, parses out the returned joke, attaches it to the original message_data object, then returns it as an SMS to the sender.
At this point, if you wanted to run the application without any additional validation, you would be good to go.
Adding a Validator
Since we initially said the sender should text ‘yo momma’ to our application number, we should make sure that the message received says ‘yo momma’ and nothing else. Let’s add a custom validator.
@pyrowire.validator(name='yo_momma')
def yo_momma_validator(message_data):
    if not message_data:
        raise TypeError("message_data must not be None")

    return not 'yo momma' == message_data['message'].lower().strip()
Hmm...this will work, but, maybe it’s too harsh. Let’s back it up so that our custom validator just checks to ensure that the phrase ‘yo momma’ is in the text body.
@pyrowire.validator(name='yo_momma')
def yo_momma_validator(message_data):
    if not message_data:
        raise TypeError("message_data must not be None")

    import re
    return not re.search(r'\byo momma\b', message_data['message'].lower().strip())
Yeah, that’s nice. Let’s go with that.
Overriding a Default Validator
If you want, you can override a default validator simply by redefining it in your application file. For example, pyrowire comes with a profanity validator to ensure that incoming text messages aren’t profane. This runs by default, but for the yo momma app, we are going to disable it.
# custom handler and validator here

@pyrowire.validator(name='profanity')
def override_profanity(message_data=None):
    pass
This is somewhat of a trivial example, since if we want to disable a validator, we only need to remove it from the topic validator dictionary in our settings file. Since we haven’t covered settings yet, however, this example stands to illustrate that you can override default validators.
Settings
Sweet, we are almost ready to run this sucker and start dropping momma jokes on people. We will need to dial in our settings file though, so it knows what to do when a message with the topic ‘yo_momma’ is received. To do that, we open the settings.py file that we stubbed out earlier.
import logging

TOPICS = {
    'my_topic': {
        'send_on_accept': False,
        'accept_response': 'Great, we\'ll get right back to you.',
        'error_response': 'It seems like an error has occurred...please try again later.',
        'validators': {
            'profanity': 'You kiss your mother with that mouth? No profanity, please.',
            'length': 'Your message exceeded the maximum allowable character limit
                       (or was empty). Please try again .',
            'parseable': 'Please only use alphanumeric and punctuation characters.'
        },
        'properties': {},
        'twilio': {
            'account_sid': '',
            'auth_token': '',
            'from_number': '+1234567890'
        },
        'max_message_length': 160
    }
}

PROFILES = {
    'dev': {
        'debug': True,
        'log_level': logging.DEBUG,
        'redis': {
            'host': 'localhost',
            'port': 6379,
            'db': 0,
            'password': ''
        },
        'host': 'localhost',
        'port': 62023
    },
    'staging': {
        'debug': True,
        'log_level': logging.WARN,
        'redis': {
            'host': 'localhost',
            'port': 6379,
            'db': 0,
            'password': ''
        },
        'host': '0.0.0.0',
        'port': 0
    },
    'prod': {
        'debug': False,
        'log_level': logging.ERROR,
        'redis': {
            'host': 'localhost',
            'port': 6379,
            'db': 0,
            'password': ''
        },
        'host': '0.0.0.0',
        'port': 0
    }
}
Ooh, looks like it still has all the default settings, which is good. Let’s update the TOPICS section so it works for our application:
import logging

TOPICS = {
    'yo_momma': {
        'send_on_accept': False,
        'accept_response': 'Yo momma is so fat...',
        'error_response': 'It seems like an error has occurred...please try again later.',
        'validators': {
            # removed the profanity validator, since we don't want to use it.
            'length': 'Your message exceeded the maximum allowable character limit
                      (or was empty). Please try again .',
            'parseable': 'Please only use alphanumeric and punctuation characters.'
        },
        'properties': {},
        'twilio': {
            'account_sid': '<MY_TWILIO_ACCOUNT_SID>',
            'auth_token': '<MY_TWILIO_AUTH_TOKEN>',
            # update with your real number
            'from_number': '+1234567890'
        },
        'max_message_length': 160
    }
}
What changed?
- the name of the topic dict object
- the accept_response definition
- we removed profanity from the list of validators for ‘yo_momma’
- we added Twilio information (this step is rather crucial)
Cool, now that we have our topic defined, we can move on to getting our profile/host settings dialed in, which incidentally, should be already done for our dev environment.
At this point you can also go back to your app file and remove the override on the profanity validator. Because we just removed it from the ‘yo_momma’ topic dictionary’s ‘validators’ sub-dictionary, it won’t apply to your incoming messages.
Host Settings
The other part of our settings file are the Profile/Host settings. Since we are still working locally, let’s just worry about the ‘dev’ settings for right now (we’ll get to the staging/production settings in a bit):
# TOPICS defs up here

PROFILES = {
    'dev': {
        'debug': True,
        'log_level': logging.DEBUG,
        'redis': {
            'host': 'localhost',
            'port': 6379,
            'db': 0,
            'password': ''
        },
        'host': 'localhost',
        'port': 62023
    },
    # staging, prod settings below
}
This should all look pretty straightforward. We are developing locally using the port 62023, with a local, password-less, Redis instance, and have debugging flags set to log at a debug level.
Running Locally
- Checklist:
- handler set up. Check.
- validator set up. Check.
- profanity filter disabled. Check.
- topic and profile settings in. Check.
Awesome, it’s time to run this sucker. Yo momma is about to get rained on.
To run this app, navigate to the root of your project directory, and make sure your virtual environment is active. Next, run:
$ ENV=DEV python app.py
Note that you need to include the ENV environment var so pyrowire knows which profile to choose. Running the above command will spin up a web application on port 62023, and will spin up one worker per topic defined in your settings file (in the case of this tutorial, it should spin up one worker).
In this example, we’ve omitted the RUN=(web|worker) environment variable, which causes both the web and worker processes to run at the same time. When we move to Heroku, or some other platform like AWS, we will add the RUN variable so we can separate the work across nodes. We will cover running as web or worker in the Heroku section below.
Sending a Test Message
For our test, we are going to do the following:
- run ngrok to get a public-facing URL for our local environment
- add the ngrok URL to Twilio
- send a test message
First we need to run ngrok to get our public-facing URL. The default port that pyrowire is set up to run on is 62023. Open up a terminal prompt and run:
$ ngrok 62023
Grab the forwarding http URL (the part before the ->), and copy it. Next, open up your Twilio account page. If you haven’t set up a Twilio account yet, there’s no time like the present. Head on over to the Twilio website to get started with that.
Next we need to make sure your Twilio number is pointing at our ngrok endpoint:
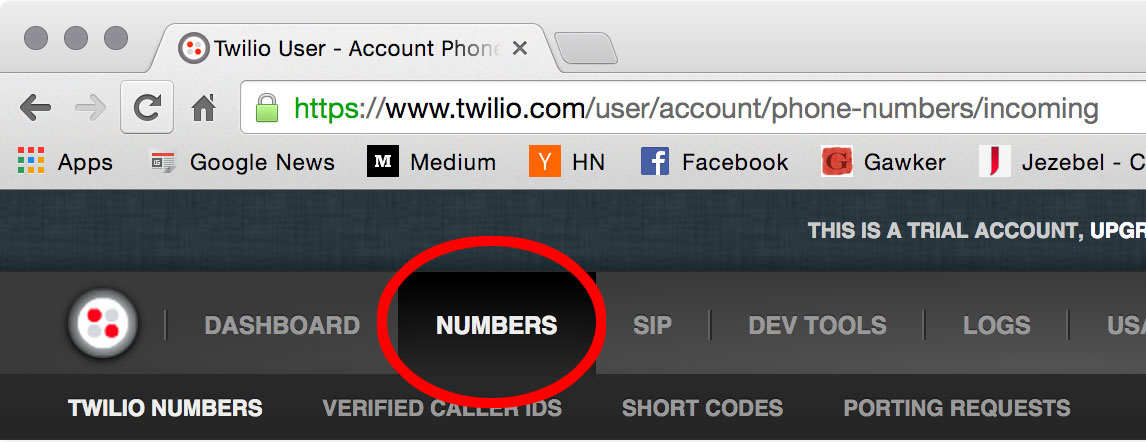
- Navigate to your Twilio account page then click the ‘Numbers’ link in the nav bar.
- Click on the phone number you want to set up.
- Add the ngrok endpoint, with the topic queue in the URL (e.g., http://25ab3b9b.ngrok.com/queue/yo_momma

Lastly, it’s time to send a test message. Grab your phone, and shoot a message to the number you used for your app endpoint in Twilio, and watch the magic happen.
Deploying to Heroku
pyrowire makes deploying to heroku super easy with a fabric walkthrough. To get started deploying this application, just run:
$ pyrowire --deploy-heroku
This will walk you through logging into your Heroku account, if you haven’t already, setting up an app, if you haven’t already, and adding Redis as an addon, if you haven’t already. It will take you all the way to the point where you will just need to add any changes to git, commit, and push to Heroku.
You will need to go update your Twilio phone number’s endpoint with the Heroku endpoint once your deployment is running.
Configuring Redis
If you didn’t initially set up a Redis addon in the above --deploy-heroku step, you can always go back later and do that by running:
$ pyrowire --add-herkou-redis
Bombs Away
So now you have your Twilio endpoint set up, your application is running in Heroku, and you are ready to drop some bombs on people’s moms.